Select Filter, OptikVerve Labs, Virtual Photographer

The plugin opens.

Cleck the On/Off Box and leave the Original Radio Button selected.
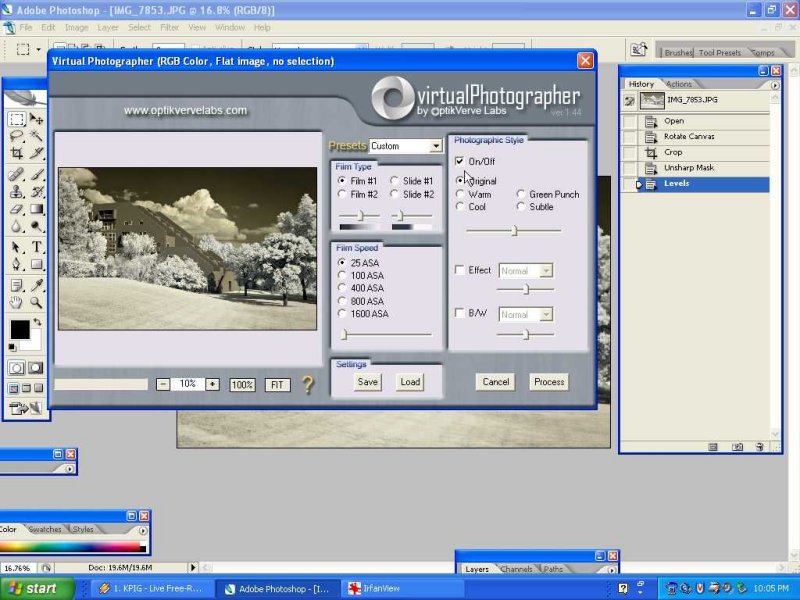
Check the B/W Box, Leave Normal selected.

You can play with the Slider under the Normal Box. I did not make any change this time.

Click on the Process Button. Virtual photographer will convert the image based on your selections. There are a great number of other highly adjustable tones and changes available at the click of a mouse in this plugin. I advise you to take some time to explore this plugin.


No comments:
Post a Comment